Welcome to the fascinating world of vacuum sealing for long-term food storage. If you're like many others who are stepping into the realm of emergency preparedness, you might find yourself intrigued by the idea of vacuum sealing as a method to extend the shelf life of your provisions. Whether you’re a beginner or have some experience, this guide aims to offer a comprehensive look at vacuum sealing techniques and how they can be incorporated into your prepping strategy.
Understanding Vacuum Sealing
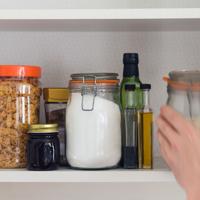
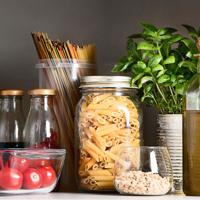
Vacuum sealing involves removing air from a package before sealing it to increase the shelf life of food items. By eliminating air, you’re reducing the amount of oxygen that can cause food to spoil, and preventing the growth of aerobic bacteria and mold.
Why Use Vacuum Sealing?
- Prolonged Shelf Life: It can significantly extend the shelf life of dry goods, meats, and other perishables.
- Protection: Offers an added safeguard against natural elements like moisture and pests.
- Space Efficiency: Vacuum-sealed bags are compact, making storage easier and more organized.
Types of Vacuum Sealers
Choosing a vacuum sealer is an important first step. Here are the common types:
1. External Vacuum Sealers
These are popular for home use. They are generally affordable and straightforward to operate:
- Noted for their user-friendliness.
- May not be suitable for liquid-rich foods without prior freezing.
2. Chamber Vacuum Sealers
Though initially pricier, these are versatile and powerful:
- Capable of sealing liquids without prior freezing.
- Ideal for high-volume storage plans.
Preparing Foods for Vacuum Sealing
To prepare foods properly, a bit of planning goes a long way. Here are steps and tips to consider:
Step 1: Select the Right Foods
Not all foods are created equal. Dry foods like grains, pasta, nuts, and coffee beans are great candidates for vacuum sealing. However, many people also opt for meats, cheese, and even vegetables.
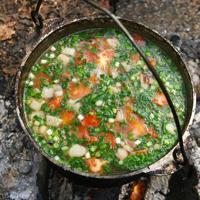
Step 2: Pre-Freeze Liquid-Rich Foods
If you're sealing items like soups or marinated meats, consider pre-freezing them first. This helps prevent liquid from interfering with the vacuuming process.
Step 3: Proper Portioning
Consider dividing bulk items into meal-sized portions. This not only helps with organization but also ensures that you only open what you need.
Steps to Efficient Vacuum Sealing
Following a methodical approach can enhance results. Here’s a broad guideline:
- Clean Your Materials: Ensuring bags and foods are clean will prevent contamination.
- Fill Bags, Leaving Space: Avoid overfilling. Leave at least 3 inches of space to ensure a good seal.
- Seal the Bag: Place the open end of the bag in the vacuum sealer, ensuring no wrinkles or folds.
- Label and Store: Once sealed, label your bags with dates and contents for easy tracking.
Tips for Best Results
- Use specially designed vacuum sealer bags. Ordinary plastic bags might not hold up over time.
- Regularly check seals for any failure, especially if storing food for extended periods.
- Store vacuum-sealed items in a cool, dark place to maximize lifespan.
Safety and Considerations
Vacuum sealing is not foolproof. Here’s what to keep in mind:
- Check for Holes or Tears: Over time, bags can develop micro-tears that compromise their integrity.
- Beware of Botulism: While vacuum sealing reduces oxygen, it doesn’t eliminate the risk of anaerobic bacteria like botulism in low-acid foods. Pressure canning may be more appropriate for some items.
- Rotate Stock: Use a first-in, first-out system to ensure nothing goes to waste.
Personal Reflections
I was initially skeptical about the efficacy of vacuum sealing. However, once I tried it, I was pleasantly surprised by how much longer my food lasted. Plus, I found peace of mind knowing that my family’s emergency pantry has some extra layers of protection.
Conclusion
Vacuum sealing can be a useful tool in your emergency preparedness arsenal. While it is not a miracle solution, it provides a practical way to enhance food storage efforts. As with all things in prepping, it comes down to what works for you and fits your family's needs. Be sure to research and experiment to find your perfect balance.
For more information, try looking into resources from reliable sources or experiment with a few methods to find what suits your lifestyle. Happy prepping!